... I've been doing stuff, just not posting about it.
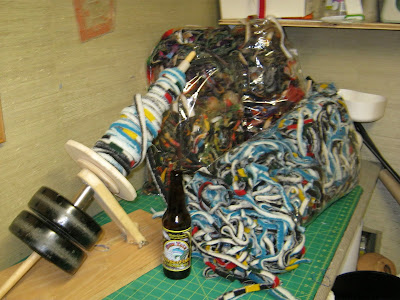
Yesterday I went to buy rags for my rugs and found some really great stuff. On my way home I always pass by the Pendleton woolen mills outlet store. I have always meant to stop in but never have, until yesterday. After weaving the blankets they cut a narrow strip off the edge, and, they sell those strips at the outlet store. I bought a bunch of them. I was lucky enough to get 4 1/2 pounds all in the same color. I think it was trimmed from this blanket.
I also picked up a bunch in several different colors.
I spooled up the glacier wool and started weaving,
Showing posts with label Hats. Show all posts
Wednesday, December 29, 2010
Wednesday, November 11, 2009
so far this fall...
Wednesday, January 14, 2009
I've not been entirely idle.
Someone over on the Men Who Knit site was looking for a simple hat pattern, so, here's my basic hat instructions, the variation possibilities are endless.
Cast on multiples of 6 stitches. I generally go for 96 on size 8 DPN.
Knit 1, purl 1 or K2,P2, or K2, P1, your choice of ribbing for however far you want it to go up the hat.
If you want the ribbing to turn up like in the picture work ribbing for 2 inches and purl 1 row as a crease line.
After you have about 4 inches of the hat "body" start working the decreases. I generally put in a decorative row or two at his point to transition from what ever stitch pattern I'm using, i.e. cables, before going in to the decreases. I often use the "braid" as described in this entry.
The decreases are worked every other row. divide number of stitches by 6 and knit two together where this number falls,
for example; 96 divided by 6 = 16, so every 15th and 16th stithes are knit together.
knit 1 row
next row every 14th and 15th stitches are knit together
etc.
when you're down to 5 or 6 stitches between dividing points work the decrease every round.
when you have only 6 stitches left on the needles break off the yarn, thread it through remaining stitches, pull through to inside and weave in.
Weave in any loose ends.
You have a hat.
Sunday, November 2, 2008
The G.ee W.hiz I geuss it's a Bush hat
Start with an idea but no real plan as to how to make it work.
Size 8 U.S. Needles/ 5mm
Cascade 220 yarn.
Cast on 108 stitches.
Join into a round and work k2, p2 ribbing for 2 inches/ 5cm twisting all the knit stitches. (knit through back of loop).
This yarn was originally a sock that I started and wasn't working out so well so I ripped it out and rewound it not bothering to take out the stripes.
In the hat the stripes didn't really work out all that great but let's not fix it, let's just keep going as if everything is okay. we didn't really have a plan to start with so just keep going.
Begin pattern rows;
Row 1. Begins between the first 2 K stitches. Place a marker.
Bring the yarn forward, slip the next K stitch and P stitch onto the right needle, bring the left needle forward and through the k stitch, slip both stitches off the right needle letting the purl stitch dangle in mid air before catching it back up onto the right needle. insert left needle into P stitch and purl. Bring yarn to the back and K next stitch. (twisted, ktbl)
Now slip the next p stitch and K stitch onto the right needle, bring left needlebehind the work and through the P stitch, slip them off the right needle letting the K stitch dangle before catching it up with the right needle. Insert left needle and K this stitch, p1. Repeat to end of round.
Row 2. knit or Purl the stitches as they are. All Knit stitches are still twisted.
Row 3. P1, cross the 2 k stitches and knit them similar to above instructions, P1. Repeat to end of round.
Row 4. Repeat row 2.
Row 5. as row 1 but the K and P stitches move in opposite directions.
Keep repeating these 4 rows until you have about 5 inches/ 12 cm
Doesn't that make a lovely trellis pattern?
Now it's time to start the decreases.
Decide that you cast on 100 stitches, DO NOT go back and count.
100 divides well by 4, but is 4 decreases per round enough? Probably not. 100 doesn't divide by 6 but it does divide by 5. Pentagonal is good! okay every 20 stitches k 2 together, or in my case it happened to be P 2 together.
Hmmm... there are extra stitches at the end of the round. Do NOT go back and fix it, just keep going as if everything is okay. Decrease every other round staying in Pattern as much as possible, don't worry that it's not really working out evenly or well. Fumble forward! When you have 70 stitches left on the needles you'll realize that you're very confused and your lovely trellis is a mess. Don't stop and fix anything. Go back to your friend the pentagon, forget about the Trellis pattern you intended, knit all stitches twisted, you started with twisted stitches and by golly you're going to finish with the twisted stitches, decreasing evenly 5 stitches per round every round until you have 5 stitches left.
Break off yarn, thread it through the remaining 5 stitches pull tail through to the inside and weave it in. weave in the cast on tail and you're finished.
The most important thing to remember with this hat is to never acknowledge the bad judgement calls, ignore erorrs, don't fix anything, just keep going as if everything is okay.
Subscribe to:
Posts (Atom)