Hallo Leute, es wird ein paar Tage dauern dies Eintrag auf Deutsch umgestzt wird, ich bitte auf Geduld , (Ja, ich weiss wohl dass ich habe Früher so 'ne Versprechung gemacht und es noch nicht getan, drückt mir die daumen das dieses Mal es geht besser ;D)
Hello Folks, it's going to be a while before I get this entry translated into German, please be patient. ( Yes, i know I've made similar promises in the past, and broken them, cross your fingers and hope I do better this time.;D)
Part 1.Part 2.Intermezzo.Okay, we know from our
percentage formula that as soon as we reach the place where we want to start the armhole steeks we need to place 20 stitches on hold. Then using
Eunny Jangs steek method, I chose 5 as the number of stitches for my steek. We continue knitting, decreasing every other round on both sides of the steek, for about another inch and then, using the same steek method, we begin the V-neck opening.
NOTE: I put 2 stitches on reserve at the beginning of the neck opening, in a round that did not have decreases so that the decreases for arm holes and neck openings would be in the same rows.Klick on photos to enlarge.
 When I got to the shoulders I knit across to the v-neck, bound off the steek stitches and the worked a couple of short rows to give the shoulder some shape. Then the arm steek stitches were bound off and the back was worked with matching short rows to the front. The yarn should be at the armhole openings top. Now, the fun part, to join the shoulder I used the cowichan shoulder join. This is a 3 needle bind off with a special twist. I worked from the inside, but if you work it from the outside it will leave a nice decorative double row of stitches. With the stitches to be joined on 2 needles held next to each other in the left hand, take up a second needle, preferably a short one, I had an old wooden needle that I cut down, sharpened with the pencil sharpener and sanded with 1000 grit sandpaper. From the near needle of stitches knit 1 stitch, pivot the working needle to position it ready to purl one stitch from the far needle. You are using BOTH ends of the working needle. You'll now have 2 stitches on the working needle. Now, with the end of the needle that you used to knit 1 stitch, knit 1 more stitch from the near needle and pass the first stitch over it, with the purl end of the working needle purl one stitch from the far needle and pass the first purl stitch over it. Repeat to end of shoulder join. In this case I have ywo colors of yarn, so I worked 1 knit and purl in one color and the next in the second color so that both colors would be in place to continue knitting. Now knit across the back, bind off the second armhole steek, work the matching short rows on the second shoulder and repeat the shoulder join steps.
 Now stabilize and cut your steeks. See the Eunny Jang lesson. I use her crocheted steeks.
You're now ready to pick up and knit the stitches down one side of the neck opening, knit one of the 2 set aside stitches, make one stitch, knit the other saved stitch, these three stitches will be used to work a decrease at the point of the neck opening. Pick up and knit the other side of the neck opening.
The band; I chose to use a "braided" decorative band rather than a ribbed band. Knit a round doing 1 stitch color A, one stitch color B, repeatingly. (For the neck opening I only did one of these rounds and found after finishing the band that I wanted two rows of it but was too lazy to go back and re-do it. I did the double round on the armholes though.) working a slip one , knit two together pass slipped stitch over decrease at the v of the opening, this rather awkward to accomplish nicely in this particular band treatment and I fumbled around with it and still don't have any good tips on making work well.
Now, pull both colors of yarn to the front and purl 1 color A, bring color B up in front of color A and purl the next stitch, repeat purling 1 color A, one color B to end of round always bringing the new color up in front of the old color. This twists the yarn coming from the balls into a great big long twist, I've found that if a pull a few yards out of the balls first and gently comb the twist with my finger as I work it helps prevent it becoming too much of a mess.
For the next round you will purl 1 A, 1 B bringing the new color up BEHIND the old color, this untwists your yarn. Pull the yarns back to the back side and knit a round, or two of the alternating colors. Break off the secondary color and purl 1 round in primary color, knit 5 rounds plain and cast off, I found that a purl cast off looks neater.
Fold the band under at the purl round and sew into place. Pick up and knit the stitches for one and then the other armholes using the same "treatment", no "V" to fumble around with though.

Block and wear.
 I think I could have picked up fewer stitches around the neck opening and it would have looked a little better.
 I did not want to pay the price for Maple as was probably used for the original, so I bought Poplar. Milled it to size and nailed and glued it up.
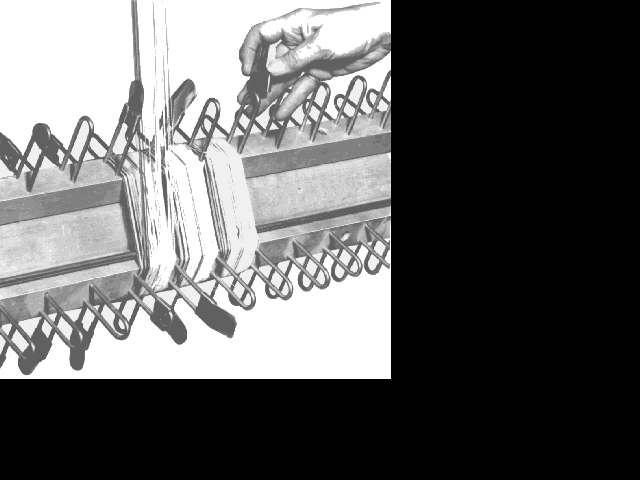
 I really wanted to do something more like the metal section dividers of the Lerclerc loom, but could not find anything readily available to make that happen, something along the lines of a large stainless steel fence staple.
 A light sanding with 22o grit sandpaper, x 76.
 And now it's time to quit and drink beer for the rest of the evening.
 I did contact Clayton Boyer though, an incredible designer and builder of wooden gear clocks.
 A light sanding with 22o grit sandpaper, x 76.
 And now it's time to quit and drink beer for the rest of the evening.
 I did contact Clayton Boyer though, an incredible designer and builder of wooden gear clocks.