Wednesday, December 29, 2010

It's been a while...

... I've been doing stuff, just not posting about it.
Yesterday I went to buy rags for my rugs and found some really great stuff. On my way home I always pass by the Pendleton woolen mills outlet store. I have always meant to stop in but never have, until yesterday. After weaving the blankets they cut a narrow strip off the edge, and, they sell those strips at the outlet store. I bought a bunch of them. I was lucky enough to get 4 1/2 pounds all in the same color. I think it was trimmed from this blanket.
I also picked up a bunch in several different colors.

I spooled up the glacier wool and started weaving,

It looks like this. I'm pleased.
I've also been busy working on a hat pattern. This picture shows them all inside out, the one on the head is the only one that is not fully reversible.
Here it is from the right side, the rest are the same hats as above, just from their reversed side.


transferring the process from inside my head to a written, understandable set of instructions is proving challenging though.


Thursday, September 30, 2010

Im published, sort of.

My knit Market bag is now available in 4 Portland, Oregon area stores.
Close knit
TheNaked Sheep
Happy knits Please click on these links for more info on each store.
and Twisted.
Happy knits and Twisted will be carrying an expanded more comprehensive version, "The Knit Mesh Maket Bag Tutorial", and will sell it to you as an individual if you call them. I still have to supply them with copies, (wait until Wednesday to call, unless you want to express anxiousness to get the pattern.)
Close knit has not yet had an opportunity to weigh in on which version they will carry, they only know about, and have, the abbreviated version, "Knit Mesh Shopping Bag" or whether they'll sell it to you if you call. I have no doubt that they are willing to do that though. I'll be talking to them again this coming week.
The Naked Sheep has opted to sell only the abbreviated version, at this point. That may well change. They will probably also sell it you if you call, I forgot to ask when I talked to her today.
I personally will not sell it to you as an individual. It is not available from me on-line. I want the pattern to be available only to locally owned and operated yarn shops and their customers, and support local businesses and economies. I have initiated contact with Wild Purls in Billings, Montana. Not local to me, but perhaps local to you. Call and tell them you're interested. That is my intent. I have a freind in Texas who will be visiting The Tinsmith's Wife in Comfort. Again not local to me, but local to others.
Do you understand the theme here yet? I want to support any locally owned and operated business, anywhere! Put your local shop in touch with me. My pattern is not available on the web.
The abbreviated "Knit Mesh Shopping bag" walks you through the basic pattern and 2 variations, with a basic instruction on how to use the pattern to go further. "The Knit Mesh Market Bag Tutorial" will give you a basic pattern, a few instructions on stepping outside of the set parameters, it only takes a few for us mischief makers, 9 variations on the basic "body" of the bag, and a couple of hints on how to spice up the overall design. Your imagination is the only limit on the possibilities.

Tuesday, September 28, 2010

I promise...

...I've not been ignoring you all. Lots is going on, I've just been lazy about writing. new stuff coming soon.

Sunday, September 5, 2010

The whole neighborhood smells delicious

...and the smell is coming from my house. I'm baking chocolate chip cookies. I won't claim, like everyone else, that my cookies are the best chocolate cookies ever, but I will claim that they are pretty darn good.

Cream together:
1 cup (2 sticks) Butter and
1/2 cup white sugar,
1 1/2 cups dark brown sugar ( the more it smells like molasses, the better.)
The creaming should last 3 to 4 minutes, more fluffily mixed equals better cookies.

Add;
1 teaspoon vanilla extract, real vanilla
a dash of almond extract
2 eggs, 1 at a time beating well between additions

Sift together;
2 1/2 cups flour, (1 cup can be whole wheat if you have a wierdo living in your house
that insists even cookies have to be healthier)
1 teaspoon baking soda
1 1/2 teaspoons baking powder
3/4 teaspoons salt, (kosher or sea is best)
a generous pinch of cinnamon.

mix dry ingredients into butter, sugar, egg mixture just until incorporated. Do not overmix.

gently stir in 3/4 cup chopped walnuts and 1 or so cups each of chocolate chips and butterscotch chips.

Put generous tablespoonfuls of cookie dough onto a baking sheet about 3 inches apart and bake in a preheated 350 degree oven for 12-14 minutes. Allow to cool on the sheet a few minutes before removing to a cooling rack.

Be adventurous, use different kinds of nuts, I like sweetened coconut flakes. If using salted nuts though, use a little less of the actual salt in the recipe.

Peanut butter chips and white chocolte chips are also fantastic substitutions!

Sunday, August 15, 2010

Making an old chair new(er)

Some 25 years ago I rescued 4 pieces of furniture from a barn in Wyoming. One piece is stamped with "Old Hickory, Hendersonville, Indiana." It looks like the company still exists, though in Shelbyville. The original seats and backs were rotted away so I used some cotton clothesline rope to weave new seats. It was all I could think of at the time.
Not a great solution, but it's lasted all these years. For years I've been thinking I should learn to weave rush chair seats, but never got around to it. I've seen chairs with shaker tape seats, but hadn't really thought about it much. Several weeks ago I scored a huge piece of denim at the thrift shop. I'd been collecting old jeans, but haven't gotten around to weaving a rug out them yet. Yesterday i decided to use the denim and weave a new seat for one of the chairs. I cut the material into 3"/7.5cm wide strips.
Sewed the ends together, folded them in half, folded the edges to the middle and stitched this into a 3/4"/1.75cm wide "tape".
To add a little extra padding to the seat I mixed together oak shavings from my surface planer with some loom waste and stuffed it into a fabric envelope.
About half way across the seat as you're winding on the "warp" you tuck the pad in between the two layers of tape and continue to wind on the warp. I used only the large piece of denim for the warp and then used the old Jeans scraps for the weft.
Splices are done on the bottom of the seat. The use of a thimble is highly recommended!
With the seat complete I proceeded to cut off the cotton clothesline from the back. I love my old hunting knife.
I couldn't resist. I had a piece of heavy weight red cotton twill and decided to use it to jazz things up a bit. The front porch never looked so cheerful.
Next up, the love seat. If you were a fan of "Green Acres", you'll recognize this as same make of love seat that the Ziffels had on their front porch, Arnold courted Susy Hainey on that love seat.
I may need to take a few weeks off before I tackle that though.


Sunday, August 8, 2010

To market, to market... a grocery bag.

Portland is considering banning plastic grocery bags. I agree, the litter they create is immense. I cannot, however, endorse the use of paper bags. The line of trees left along the highways does not hide the miles and miles of deforested land behind them.
I decided to revist the traditional european string shopping bag. I looked around on the internet and found some knit or crochet option patterns. I took that info and came up with this.

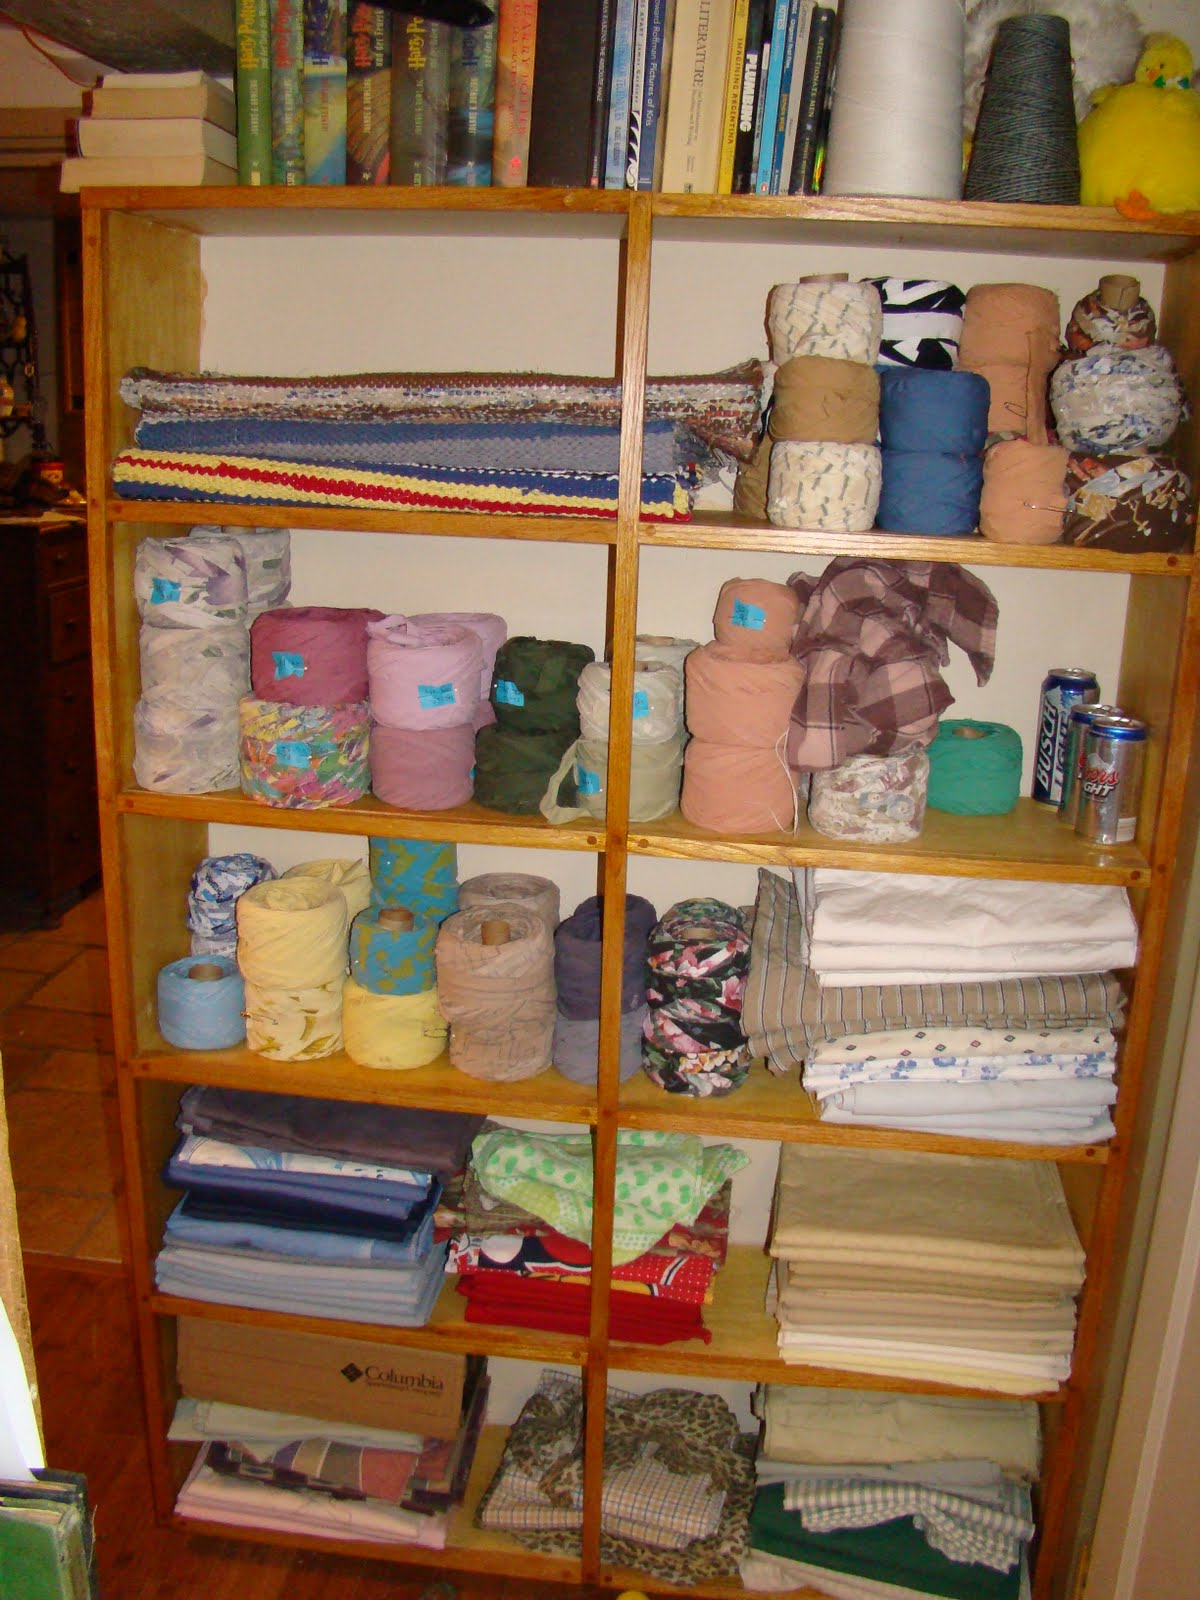
I had a 5 pound cone of 12 ply cotton/ poly string. I weighed my finished bag and had 8 ounces/.25 kg. Any cotton, hemp, linen string would be acceptable.
I used a 24 inch/60cm size 6US/4mm and a US10 1/2/6.5mm circular needle. I would probably use a size US9/5.5mm on my next one though.
The bag holds a lot.
On the smaller needle, cast on 42 stitches, knit about 4inches/10cm in garter stitch.
Pick up and knit 20 stitches on the short edge, then the 42 stitches on the long edge, and 21 stitches on the final short edge.
There should be a total of 125 stitches.
Knit 3 or 4 rows in the round.
Change to the larger needle and knit 1 row.
Begin pattern.
I opted for; yarn over, knit 2 together through back loop/twice, knit 2.
One could also do ; yarn over, knit 2 together. Any lace pattern is going to work if you do the math right.
Just keep going until you have about 10 inches/26cm of bag.
Switch back to the smaller needle and knit about an inch. Do garter stitch for an half or so inch.
Final row. (based on my count, your count will be based on your pattern and numbers)
knit 6, the distance from bag sides to handle. Knit 8, the handle stitches. Bind off looseley 14 stitches using a larger needle. On the working needle knit 8 handle stitches, the 6 handle to side stitches, the 20 side stitches and another 6 side to handle stitches, total of 32 stitches. Knit another 6 stitches and then 8 handle stitches. With the larger needle bind off 14 stitches. Working needle now knits 8 handle stitches. Knit the remaining stitches, 6 handle to side, 21 side and 6 more side to handle. You should be back to the first 8 handle stitches. Knit these back and forth in garter stitch for 12 inches/30cm. Measure the 12 inches/30cm with the handle band stretched out. place the handle on top of the next 8 stitches so that after binding off you will be able to continue on without breaking off the string. Do a 3 needle bind off of the 8 handle stitches.
With larger needle bind off 32 stitches. Knit the second handle to match the first, attach with 3 needle bind off. Bind off remaining 33 stitches with larger needle. Weave in and secure the loose ends.
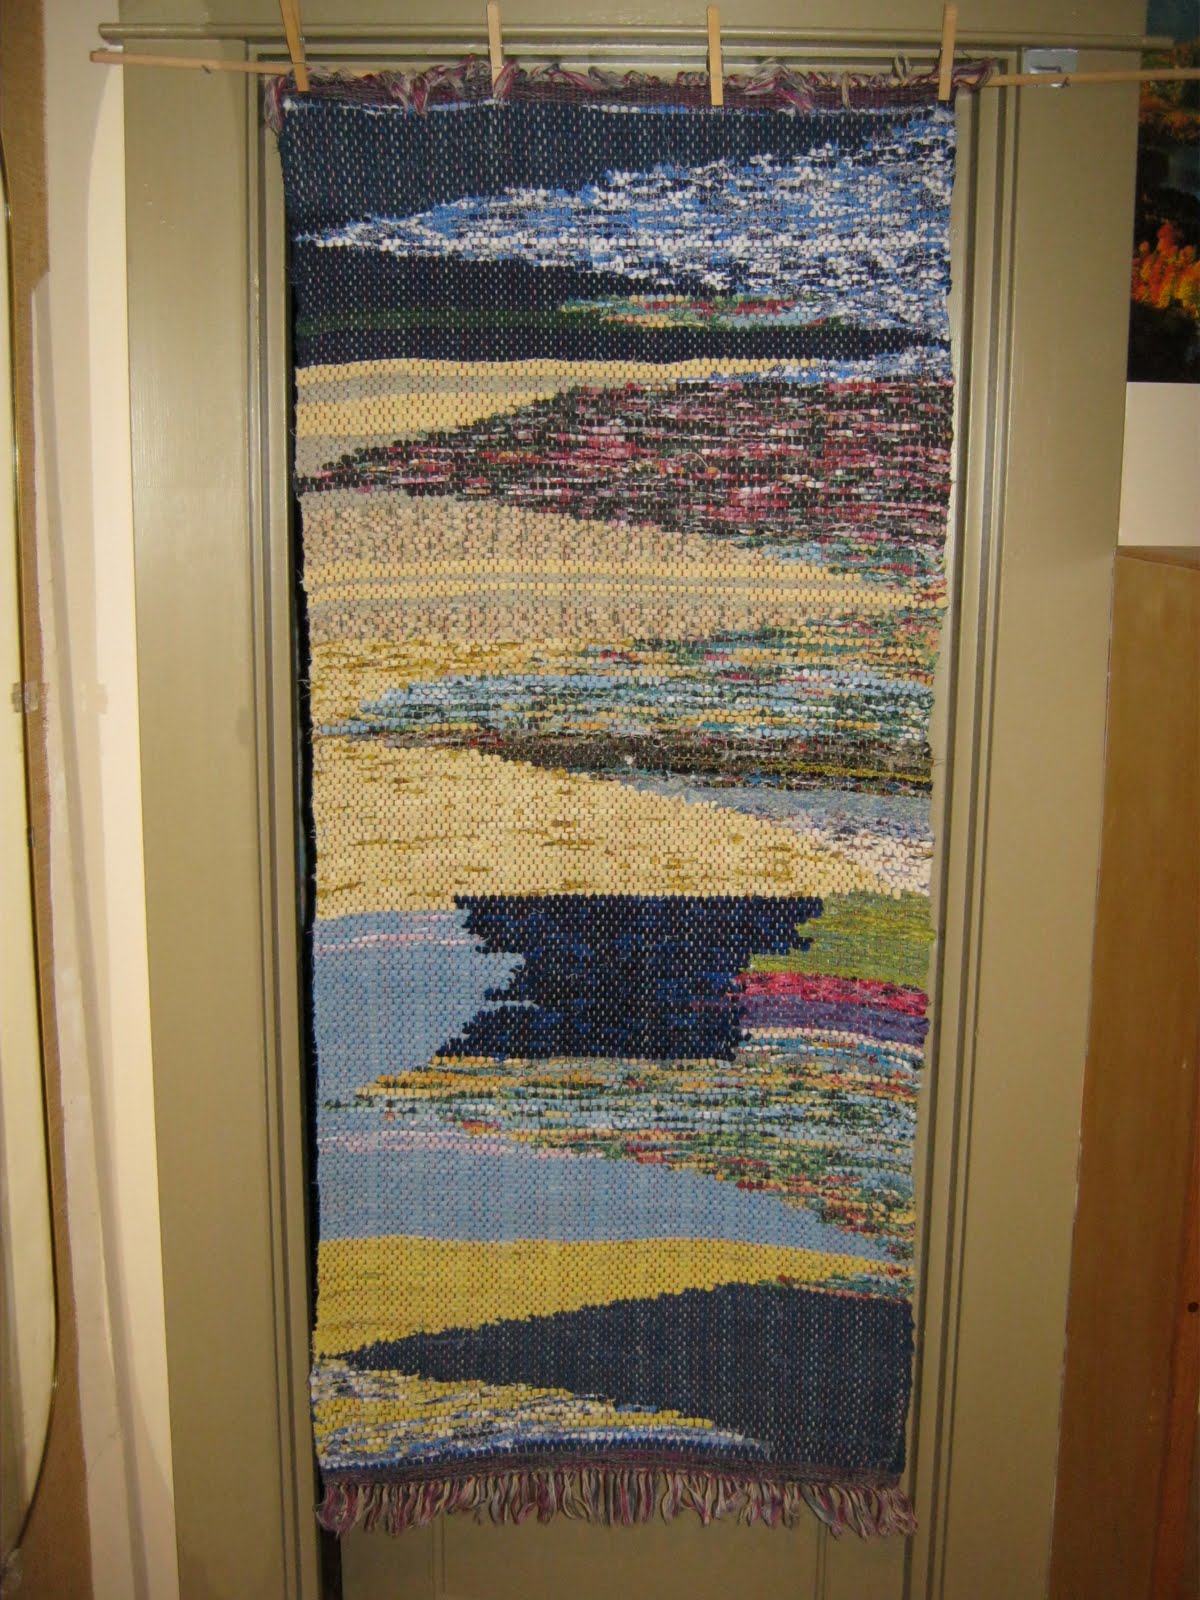
Sunday, August 1, 2010

experimentation

Using up random materials and trying out a new weaving technique yielded this rug. 24x52 inches/ 61x132 cm.
Die Ausnutzungen verschiedene Materie und die Ausprobierung ein neuer Webtechnik ergab Dieser "Trasmatta". 61x132cm.

Saturday, July 31, 2010

Out with the old.

The complaint was that this old wooden clothes drying rack was staining the white t-shirts and underwear. I'm not surprised, it has been around collecting dust and grime for years.
I was going to just build a new based on the old one but looked around and found these plans.
The wood dimensions seemed a bit flimsy to me though. I used 5/8" dowels and 3/4x1 1/2" supports. I also decided to not go to the all the trouble of shouldering the dowels and just did everything with 5/8" holes. I figure that if the supports slide along the dowels too much I can always pin them with 1/4 pegs later. I also used 4' rather than 3 foot dowels.
It was a little tricky getting all the parts in the right places. But I finally got it right.
Now I have a fresh new and much roomier drying rack for the laundry room.
I just need to wash some laundry now, hang it to dry instead of using the machine, and watch those energy savings pile up.


Sunday, July 25, 2010

After weeks of sulking...

...because I was told that my projects were too messy to be worked on out in the garden because it made it too embarrassing to have freinds over, I finally went in to the woodshop and began a project. I have been using a chair piled with pillows and folded up blankets to sit on while weaving. It's time to actually build a taller chair. This chair will be based more on the welsh stick chair, images, instructions for the adventurous, than a windsor chair, the style just suits me, personally better.
Several weeks ago I went to the log yard and picked up some elm that Joolz had set aside for me.
He harvests trees in Portland, mills them and resells them to be used for building projects. Yet another Portland "green" company, and totally to my liking.
He also had a nice piece of oak cut off that I also took thinking it might be nice for making crest rails. I unloaded it off the top of the car and split it out on the sidewalk.
Today I used the draw knife and shaving horse to rough out the legs. It's definitely not as nice as working on the shaving horse out in the garden, but it's an age old tradition to suffer for one's art;-D
The seat will be some 26"/66cm above the floor, a good 9"/23cm higher than most chairs. I've already determined that I would like the leg tenons to be a full inch/3cm in diameter where they pierce the seat instead of the 5/8" /1.6cm of the previous 2 chairs, chair 1, chair 2. This means that I will need a new tenon shaver as well. Based on my Elia Bizzarri tenon rounder and using a scrap of maple from building the face plate for my bench vise,( for some reason I never did translate that particular entry into english, if you don't do german, just enjoy the pictures). The blade will be a Kunz spokeshave blade. I'll let you know how it turns out. Using a taper reamer in maple is a bit of a task, but didn't take as long as I feared.
More later as progress warrants.

Saturday, July 10, 2010

sectional beam warping

I know some of are very unfamiliar with how my loom is warped. I found a video on the Leclrec loom site. Just scroll down the page to the sectional beam warping video and click to play. it is a 15 minute video, though only about the first 10-12 minutes deal with the warping on.

Friday, July 9, 2010

Cool pig

When it gets this hot I have to do something to cool off the Ollie pig.
I put a wet towel over her and periodically spritz her with more water. She doesn't mind at all.
I tried the "pigs like mud" theory, no go. This pig doesn't even like her feet to get wet. Much less be smeared with mud. She is used to having something on her back though. After she grew too big and too fast for me to keep knitting sweaters for her, I made her her own blanket to be covered in when she went outside in the cold.
She has still not shed all of her winter bristles, she prefers to sport a Mohawk for a few weeks before shedding all. Unfortunately, where she has shed she is subject to mosquito attacks.
She has been living full time outside for the past 2 or 3 years. Convincing a 200 pound pig to go outside in the rain got to be too much of a hassle. She would go up to 32 hours before I could convince her to go outside. I decided it would be healthier for her to live outside and go potty whenever she decided than to live in the house and go only when I could force her to go outside.
She never peed in her bed when she lived in the house, but now that she has an outside piggy shelter.....

Sunday, June 27, 2010

I have actually been doing stuff, even though I have not been posting.

I finally used up all the warp that I had wound onto the loom. I had a lot of problems though with the warp tension going more and more uneven as I progressed. Rather than saying that it was the inexperienced weavers fault, I decided that the 90 year old worn out loom parts were to blame and decided to replace this particular piece. The sectional warping beam.
I did not want to pay the price for Maple as was probably used for the original, so I bought Poplar. Milled it to size and nailed and glued it up.
I really wanted to do something more like the metal section dividers of the Lerclerc loom, but could not find anything readily available to make that happen, something along the lines of a large stainless steel fence staple.
I decided to go along with the original design until I find what I would rather have, retrofitting shouldn't be too much of a problem. So, 3/8" dowel sharpened in the pencil sharpener and then cut to length, x76. When was the last tiome one of you sharpened 76 pencils in a row?
A light sanding with 22o grit sandpaper, x 76.
And now it's time to quit and drink beer for the rest of the evening.
I did contact Clayton Boyer though, an incredible designer and builder of wooden gear clocks.
His wife is a fiber artist and he has designed some items for her. I challenged him to design plans for a specific piece that I would dearly love to have, but don't have the mechanical abilities necessary to design myself. A geared device that can twist 2 strands of rags together and, in the same operation, with the use of only one crank, then wind it into a ball. We'll see if he can come up with such a plan. If anyone can, it's him. He's a wooden gear and device genius.
That then leaves me with the question; "can I follow his plans"?

Saturday, May 15, 2010

The wood is starting to tell me...

... What kind of a chair it wants to be. It turns out that it wants to be a bit different than what I had in mind for it. It wants to be more rustic and natural. Maybe not THIS rustic, but definitely not refined. Looks like I'll need to go out and find a more appropriate piece of seat wood than what I have on hand.
Der Holz fingt an, mir zu erzählen was für ein Stuhl er will werden. Nicht genau was ich plannte, eher primitiv und natur gemass. Da muss ich jetzt ein Sitzbrett aussuchen der mehr geeignet ist als was ich schon habe.


The black locust tree was cut down last year and is truthfully now too dry for this technique, but I can still work with it. It is also more knotty than is preferred. My wood guy and I are just getting to know one another though and he seems to have an understanding of what I'm doing and should be able to supply me with wood more suited to my needs in the future, which reminds me, he was looking at felling an Elm last week, I need to call him.

Das Blacklocustbaum war im vergangene Jahr gefällt und wirklich ist schon zu ausgetrocknet für dies Technik aber ich kann noch damit was anfangen. Er ist auch knotiger als gemöcht. Mein Holzmann und ich aber nur angefangen haben uns zu kennen, er schaint aber zu verstehen was ich tue und soll zukunftiger mir ausstatten können mit was ich brauche. Da erinnere ich, er hat ein Ulm angeschaut dass er fallen würde, ich muss ihm anrufen.

(click on any image to enlarge it)

I have the two arms and crest rail roughed out. I really want to keep the rustic edge of darker wood even though I know it isn't really very sound wood, but then I'm not an expert chairmaker and am allowed to do things "wrong". (can you see the mischevious smile of the creative rather than technique oriented guy?)
Die 2 Armlehne und der Gipfelkamm sind schon grob entworfen. Ich will den dunkler Holz am Randen haben, auch wenn ich weiss das er nicht genau vernünftig ist. Ich bin aber kein Expert und kann was "falsch" tun. (könnt ihr der schelmischer Lächeln der eher kreativ als techniker Mann hier sehen?)
I have also built a rooting frame for rooting cuttings from various trees and shrubs from around the garden. Hopefully some of the cuttings will strike and turn into potential material for future bonsai. It's an old cement mixing trough that had gotten holes in it. I built up a wooden frame on top of it and have an old window over it to create a kind of mini greenhouse.

Ich habe auch ein Minipflanzhaus gebaut worin ich hoffe die Abschneidungen von Bäumer und Buschen Wurzeln zu schlagen würden. Die würden zukunftiger potenzial Bonsai werden.


Sunday, May 9, 2010

What's up Lars?

Yesterday Geoff and I went to the annual Bonsai exhibit at the Portland Japanese gardens.

I've been collecting some tree and shrub seedlings from around our garden. maybe some day a couple of them will have the potential to become Bonsai.
Meanwhile I've knocked together some old scrap wood into molds for making some paper/cement training pots.
I'll do a post later on the pots.

I've also got my log soaking to keep it wet until I start making chair parts.
And I'm warming up the soil to get ready tp put in the tomatoes.
I've almost used up the warp I have on the loom and will soon be able to wind on a new one, one which will hopefully be evenly tensioned across the loom.

It's spring you know, it's time to get involved with as many projects as possible;D

Wednesday, May 5, 2010

wood fibers

It's spring, it will soon be time to hang out in the yard after work and on weekends. Naturally any red blooded guys thoughts turn to woodworking at this time of year. I went to a local wood yard this morning and came away with a chunk of black locust wood.

Let's see how it splits out.

This is a selection of similar versions of my goal.
I'll let you all know how it goes.

Thursday, April 29, 2010

For my sister on a tragic annivesary.

It's been 3 years as of today, and I'm sure the pain of her 19 year old daughters death is as fresh as it was then. I only hope that the joy she has in raising her grandson, son of her dead daughter, helps her live on.
Containment
I've heard it said that an object one makes with their own hands absorbs and retains the thoughts and feelings of the maker for all eternity. I look now at the ceramic jar, with lid, that I made so long ago and try to remember when I made it. Was it after the funeral of my mother? I think so. What was I thinking when I made it? Did I think of my mother, the funeral, the get together afterwards with family and the inherent weirdness that comes from such events?I know for sure that I made this vessel before my grandmother died, and before my oldest sisters boy drowned in the river. I could not attend either of these funerals. The jar however was in my younger sisters house through both of these occasions. Can anon-sentient object continue to absorb the psychic energy that flows daily from the sentient beings around it?I made the jar on a pottery wheel, the process of which creates a round vessel. While it was still wet I took boards and pushed in the sides to make it somewhat square. In creating something do we try to force a thing in to a shape that reflects our need to change our own lives? What emotional pressure did I exert while exerting the physical pressures required to push the inherent roundness of this vessel into a squarer shape? Did I secretly, or perhaps not so secretly, try to gain some control over the life that was going on around me? Is artistic endeavor a way of dealing with what Life has or has not given me? Now, I watch as the vessel I made is lowered into the ground by nephew and niece, my younger sisters children, two young adults having their last physical contact with their sister.A vessel is made to contain things, ashes or memories, secrets that it now takes with it to the grave.

Monday, April 5, 2010

What? You're surprised it's still about rugs?

Sewing up measured sequences of rag strips for a symetrically planned rug

Winding them on to shuttles and placing them in order, left to right.

Thinking about what to do next. So many choices.


Maybe one in purples, or maybe one using primary red, blue,yellow, etc as in this former Mickey Mouse curtain?


Sunday, April 4, 2010

Okay, one more time

I have restrung the loom. Unfortunately I have two separate "original" booklets on how it should be done. One instructed me to wind on 20 threads per section to weave at 8 ends per inch. This didn't make sense, but I did it. It looked wrong when I got to the point of beginning to weave so I double checked, looking at both booklets. The second booklet said wind on 16 threads per 2 inch section, this made a lot more sense, but I already had 30 yards of warp wound on at 20 per section for 12 sections. I decided to go with the the 10 threads per inch and wound on 2 more sections to reach my desired 28 inch width. I didn't manage to thread the warp tensioning box exactly the same though, and the 2 new, outside sections are a little looser than the 12 others. Not Good! But I'm limping along until I've used up this warp.
One rug is finished, 26 by 60 inches, yeah, the 28 inch desired width narrowed down to 26, that's a technicality that I still need some practice on.
It's kind of a somber rug though, color wise, so my next one is something a little brighter.

I also added an overhead shuttle rack to the loom. The original would have been more solid, but I'm working on a budget here and used what I had in the shop, plus $3.

Monday, March 29, 2010

Not there yet

After almost a week of working on the loom itself, (related reading Here , and Here). I was ready to wind on the warp this weekend. It didn't go well and I had to rethink how it could be done, (related story here) . Success! I got the warp wound on, 30 yards/27.4 meters.
I then threaded all 240 threads through separate heddles and then sleyed, (scroll down a little) them through the reed. (Note, the author of the sleying entry threads their loom from front to back, my loom is done back to front, so all their steps in warping the loom are the reverse of what happens on my loom.)
I tied the warp on to the lease stick,
wove a couple of inches with old loom waste and string to spread the warp threads evenly,
wrapped the chosen colored rags on shuttles,
and commenced to weave.
I'm not pleased. I'm using 8 threads per inch/3.2 per cm, 1 up - 1 down and find the resulting rug just too thin. I think I'll go back and rethread the heddles to 2 up - 2 down and try again.
A lot of work to reach a point where you realize you need to go back and do it over sure, but, better to fix the problem now than to try and go forward to an end result that you already know is going to be a disappointment.